Webhooks
Automate tasks by sending real-time data to external systems.
Webhooks
Webhooks allow you to automate tasks by sending real-time data from Engine Awesome to external systems when certain events occur, such as when an object is created, updated, or deleted. This is a powerful tool for integrating Engine Awesome with other platforms by automatically triggering workflows.
How to Create a Webhook
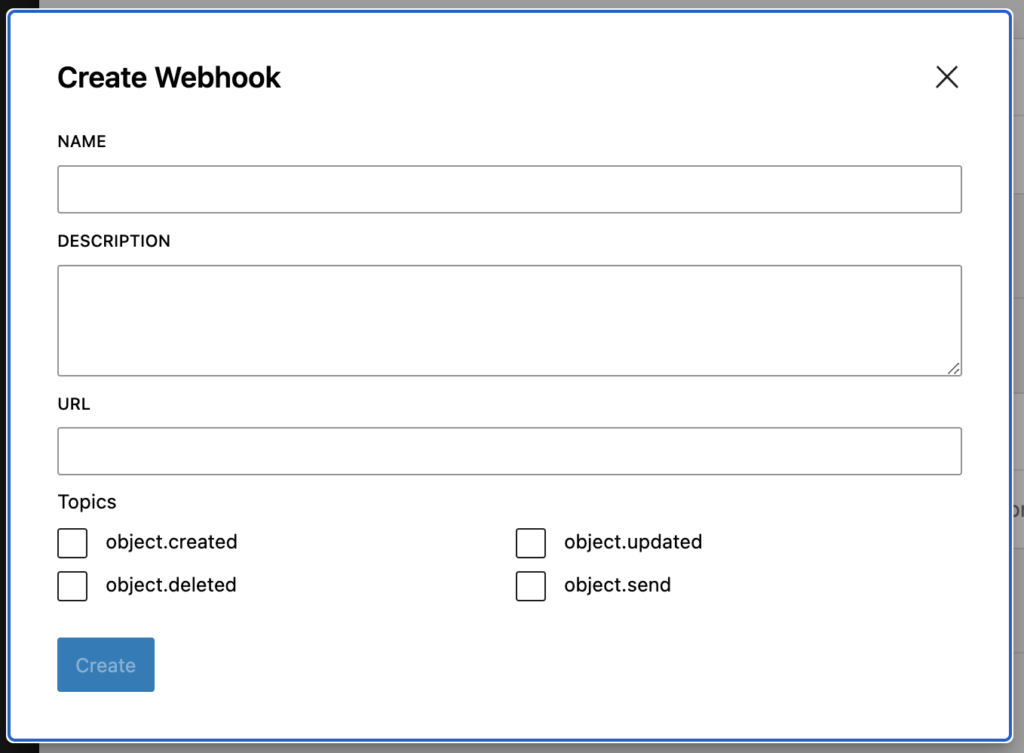
Create a Webhook — Navigate to your SETTINGS page, and then click on API ACCESS. Under the Webhooks section click the "Create Webhook" button. A dialog box will appear, prompting you to define your webhook settings.
Configure your Webhook
- Name: Provide a descriptive name for the webhook to identify its purpose.
- Description: Optionally, include a brief description of what the webhook does or which external system it interacts with.
- URL: Specify the URL where the webhook will send the event data (e.g., an endpoint in your external application).
- Topics: Choose the event(s) that will trigger the webhook.
Available Topics
IMPORTANT: Webhooks send data to external systems when events occur. Only subscribe to the topics you need.
Objects
| Topic | Description |
|---|---|
object.created |
Fires when a new object is created |
object.updated |
Fires when an existing object is modified |
object.deleted |
Fires when an object is removed |
object.send |
Fires when an object is sent (e.g., a task or form) |
Webhook Payload
When the event occurs, the webhook sends a POST request to the specified URL. The payload contains detailed information about the event, such as the object type, the data that was added, updated, or deleted, and timestamps. Ensure that your external system is set up to receive and process this information appropriately.
Webhook Security
Webhook payloads are sent over HTTP to the URL you specify. To protect your data:
- Use HTTPS endpoints: Always use a secure HTTPS URL for your webhook destination to ensure payloads are encrypted in transit.
- Validate payloads: Verify incoming webhook requests on your server to confirm they originate from Engine Awesome.
- Keep endpoints private: Do not share your webhook URLs publicly. If a URL is compromised, delete the webhook and create a new one with a different endpoint.
Managing Webhooks
After creating a webhook, it will listen for the selected events in Engine Awesome and send payloads to the specified URL as soon as those events happen. You can manage your webhooks by:
- Editing: Change the name, URL, or event triggers for the webhook.
- Deactivating: Temporarily disable the webhook without deleting it.
- Deleting: Remove the webhook if it's no longer needed.
Webhook Example
Auto-create invoices from new orders
You're using a third-party invoicing service and want to automatically create an invoice every time a new Order object is created in Engine Awesome. You can set up a webhook with the object.created topic, pointing it to the invoicing service's API endpoint. Each time an order is created, the webhook sends the order details to the invoicing system, triggering the automatic creation of a new invoice.
Required configuration: Topic: object.created, URL: your invoicing service's API endpoint
Best Practices
- Monitor Webhooks: Ensure your external systems can handle the webhook payloads and respond efficiently. Webhook failures (e.g., due to incorrect URLs or service downtime) can lead to data discrepancies.
- Use Specific Topics: Only subscribe to the events you need. Avoid subscribing to all topics if you only need
object.created, as unnecessary payloads add load to your external system. - Handle Failures Gracefully: Design your receiving endpoint to return a
200status code quickly. Perform any heavy processing asynchronously to avoid timeouts.
Related guides
- Connect Engine Awesome to Zapier, step-by-step walkthrough for creating an API key and connecting it to your Zapier account
- Send a webhook when a button is clicked, how to use the Send Webhook action button (separate from system-level webhooks) to trigger automations from within a layout
- Personal Access Tokens / API Keys, create tokens with
webhook:createpermission to allow external services to register webhooks