Personal Access Tokens / API Keys
Authenticate external services with scoped API tokens.
Personal Access Tokens / API Keys
Personal Access Tokens act as authentication keys that allow external services or users to interact with Engine Awesome on your behalf. Tokens can be assigned specific permissions, limiting the scope of what actions the third-party service can perform.
How to Create a Personal Access Token
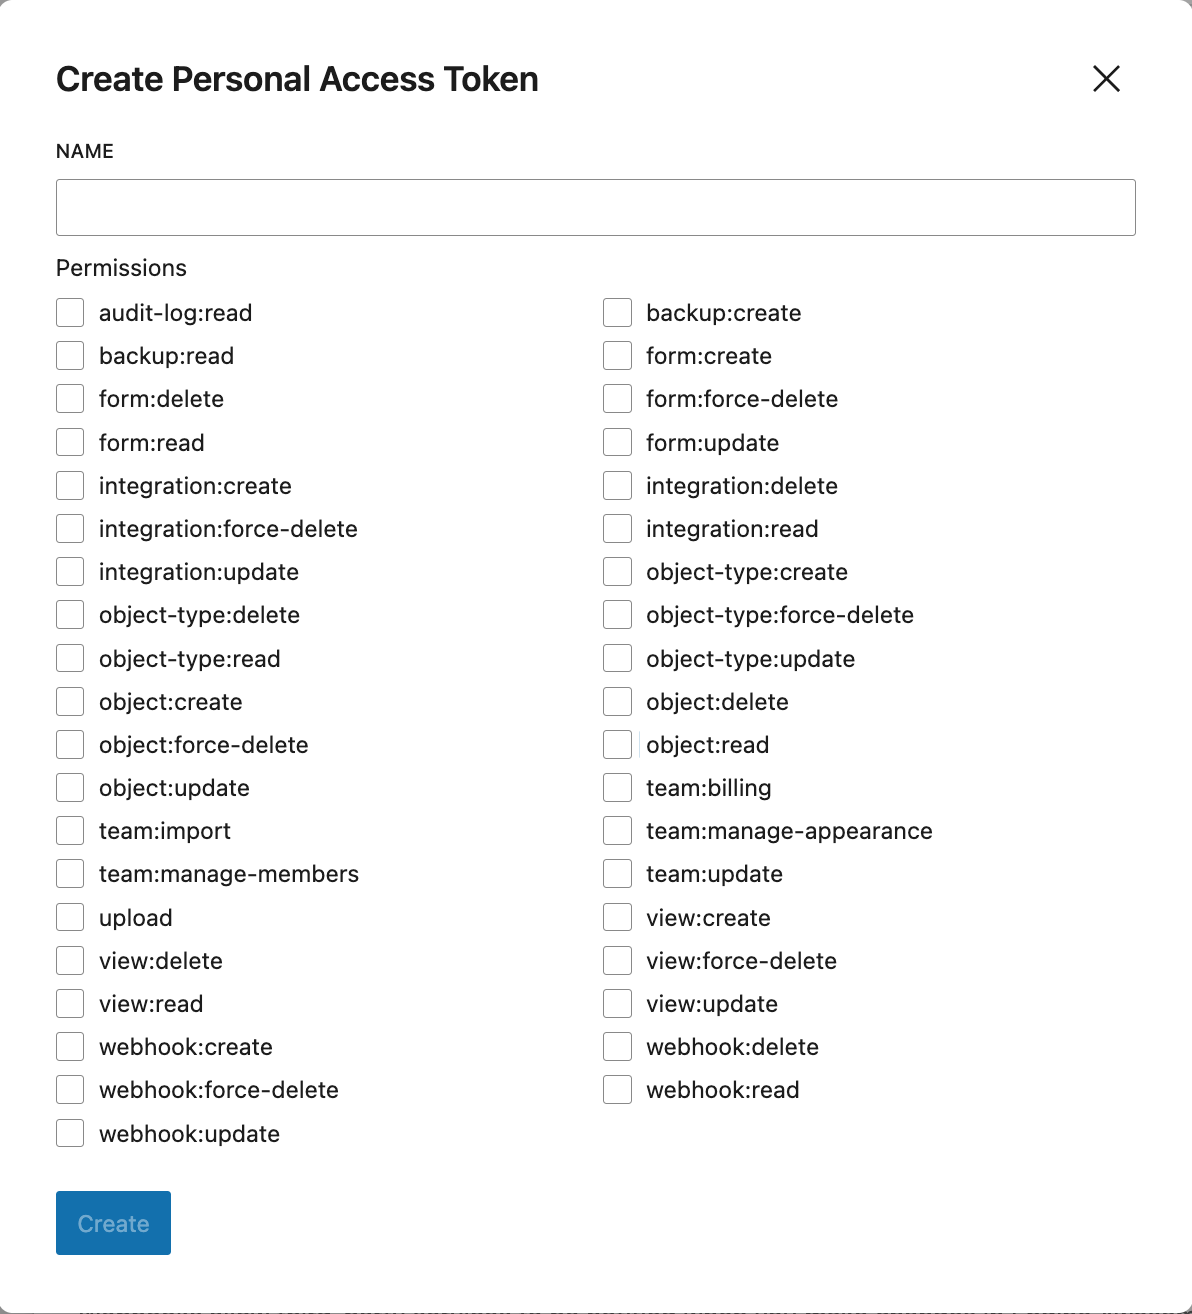
Create a Token — Navigate to your SETTINGS page, and then click on API ACCESS. Under the Personal Access Tokens section click the "Create Token" button.
Configure your Token
IMPORTANT: You will only see your token when creating it, so copy it and keep in a safe place. You will not have access to the token in the future.
- Name: Enter a unique name for the token. This helps identify the token when managing multiple tokens.
- Permissions: Check the boxes to select which permissions the token will have. Permissions determine what actions the token is allowed to perform.
Available Permissions
IMPORTANT: Tokens allow connected services to perform actions on your Engine Awesome data. Only choose the permissions you need.
Objects
| Permission | Description |
|---|---|
object:create |
Create new records in Engine Awesome |
object:read |
Read and retrieve existing records |
object:update |
Modify existing records |
object:delete |
Delete records (moves to trash) |
object:force-delete |
Permanently delete records, bypassing trash |
Object Types
| Permission | Description |
|---|---|
object-type:create |
Create new object type definitions |
object-type:read |
View object type schemas and configurations |
object-type:update |
Modify object type definitions and field settings |
object-type:delete |
Delete object types (moves to trash) |
object-type:force-delete |
Permanently delete object types, bypassing trash |
Forms
| Permission | Description |
|---|---|
form:create |
Create new forms |
form:read |
View existing forms and their configurations |
form:update |
Modify form settings and fields |
form:delete |
Delete forms (moves to trash) |
form:force-delete |
Permanently delete forms, bypassing trash |
Views
| Permission | Description |
|---|---|
view:create |
Create new views and dashboards |
view:read |
Access existing views and dashboards |
view:update |
Modify view configurations and filters |
view:delete |
Delete views (moves to trash) |
view:force-delete |
Permanently delete views, bypassing trash |
Integrations
| Permission | Description |
|---|---|
integration:create |
Set up new third-party integrations |
integration:read |
View existing integration configurations |
integration:update |
Modify integration settings |
integration:delete |
Delete integrations (moves to trash) |
integration:force-delete |
Permanently delete integrations, bypassing trash |
Webhooks
| Permission | Description |
|---|---|
webhook:create |
Create new webhooks |
webhook:read |
View existing webhook configurations |
webhook:update |
Modify webhook settings, URLs, and event topics |
webhook:delete |
Delete webhooks (moves to trash) |
webhook:force-delete |
Permanently delete webhooks, bypassing trash |
webhook:create permission on your API key so the service can register its webhook endpoints with Engine Awesome.Team Management
| Permission | Description |
|---|---|
team:billing |
Access and manage billing settings |
team:import |
Import data into the team workspace |
team:manage-appearance |
Customize theme and branding settings |
team:manage-members |
Invite, remove, and manage team members and roles |
team:update |
Modify general team settings |
Audit Logs and Backups
| Permission | Description |
|---|---|
audit-log:read |
View audit log entries for your account |
backup:read |
View and download existing backups |
backup:create |
Create new data backups |
upload |
Upload files, images, and media |
Token Security
Personal Access Tokens function as credentials for accessing your Engine Awesome data. After creating a token, copy and store it securely. Treat it like a password-if the token is compromised, unauthorized parties could access or manipulate your data. If a token is no longer needed, revoke it immediately to prevent further access.
Managing Tokens
Tokens are reusable and can be assigned different sets of permissions depending on the needs of the third-party service. If the integration requires updates to permissions, you can delete the existing token and create a new one with modified access rights. Tokens can also be deactivated if no longer needed.
Personal Access Token Example
Sync form submissions into your CRM
When a lead fills out a form on an external platform (e.g., Typeform, Jotform, or a custom website form), you want that submission to automatically create or update a contact in Engine Awesome.
Required permissions: object:create, object:update
- The form platform sends the submission to an automation service like Zapier, Make, or n8n.
- The automation service uses the Engine Awesome API to create a new record or update an existing one if the contact already exists.
User-Based Access for Personal Tokens
Personal Access Tokens in Engine Awesome are tied to individual users, meaning each token is associated with a specific user's account. Once generated, a token can be used across all teams that the user is a part of. This allows the user to authenticate and interact with Engine Awesome's API within any of their teams, without needing to create separate tokens for each team. It streamlines the process of integrating third-party services while maintaining user-level control over permissions and access.
Best Practices
- Limit Permissions — Only grant the necessary permissions when creating a Personal Access Token. Avoid giving excessive access to prevent unauthorized actions.
- Rotate Tokens Regularly — For security, rotate your Personal Access Tokens periodically and revoke unused tokens.
By using Personal Access Tokens in Engine Awesome, you can integrate your applications with external services and streamline business processes.
Related guides
- Connect Engine Awesome to Zapier, step-by-step walkthrough for creating an API key and connecting it to your Zapier account
- Webhooks, set up webhooks to send real-time data to external systems when events occur